We had some new people at the 8:00 Mass this Sunday, and I discovered afterward that we’re not doing a very good job of helping newbies get started and follow along. After you’ve been going a while, it’s easy to forget how confusing it was the first time, but it doesn’t have to be that way if people are helped a little. So for people who are thinking about joining us at St. Rose, here’s a step-by-step guide that I hope will prevent some confusion.
I’m writing about the Low Mass here, since it’s the one I attend at 8:00am every Sunday, and it’s also the form used on other days of the week. The High Mass at 11:00am Sunday and some holy days is different because the choir sings the responses and some other things, and there’s more going on. The Low Mass is easier to follow your first time, since it’s all spoken rather than sung. Maybe I’ll do another walk-through on the High Mass sometime.
When you enter the church on Sunday, there should be a holder attached to the wall next to the doors, containing bulletins and the proper of the Mass. Be sure to grab both, because the proper has the readings and prayers that are particular to that Sunday. More on that below. There are other things on the tables in the vestibule that you dont need for Mass but you might want to check out afterwards, like prayer cards and the FSSP newsletter.
When you enter the actual church, try to be as quiet as possible. There will usually be people praying before and after Mass, and they’ll appreciate the silence. You’ll probably want to sit in the back half so you can see when people do sit and kneel and so on. Rosary starts about twenty minutes before Mass, and Father hears Confessions for about thirty minutes before Mass. The confessionals are at the very back of church behind the pews to the left and right.
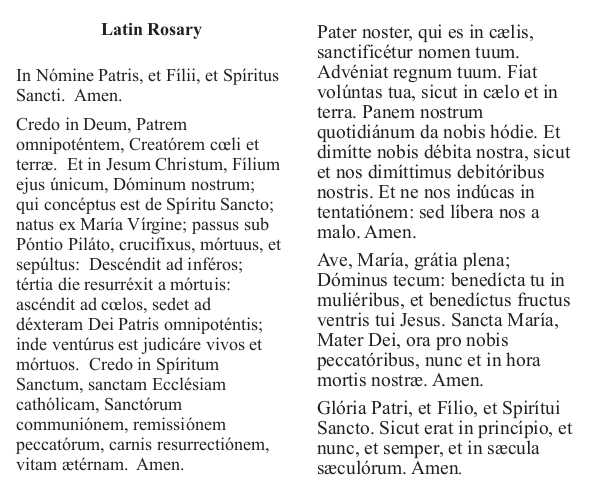
In the pew, you’ll find a Sunday missal with a red cover. This has all the prayers that are the same at each Mass, plus instructions and some commentary about what different things mean. Together with the proper, this gives you all the prayers and readings that will be used during the Mass. The Low Mass starts on pages 10-11 of the missal, and each pair of pages has the prayers in Latin and English. It also tells you when the priest moves to one side or the other and when the servers ring the bells, so there are a lot of cues in case you can’t follow the Latin.
Everyone rises when the servers and priest come out to the altar, then kneels when Mass begins with the Sign of the Cross (“In nomine Patris…”). The priest and servers recite the Judica Me (Psalm 42), alternating like it says in the missal. The servers say the words for the congregation, so the people aren’t expected to say the responses. Some people like to, but don’t feel like you’re doing it wrong if you just listen and pray internally.
After the initial prayers at the foot of the altar, the priest goes up and kisses the altar and goes to the book on the right side of the altar (the epistle side) to read the Introit. This is the first point where you’ll need the proper you got at the doorway. The Introit is followed by the Kyrie and Gloria (in the missal), then back to the proper for the Collects. The Collects are the collected prayers of the faithful, for which the Mass is being offered. There is usually one Collect, but may be as many as three if certain feasts overlap.
After the Collects come the Epistle, which is a reading from somewhere in Scripture other than the Gospels, then the Gradual (somewhat analogous to the responsorial psalm in the Ordinary form). These are both in the proper. On weekdays, the priest may read the Epistle in English only, but on Sundays he reads it in Latin, then usually again in English before his homily.
After the Gradual, a server moves the book to the left side of the altar (the Gospel side), and everyone stands for the Gospel, which is in the proper. After the Gospel, everyone sits for the homily, before which the priest may read the Epistle and Gospel in English.
After the homily, everyone stands for the Credo (Creed). We’re back to the missal now. About a third of the way through the Credo, everyone genuflects during the line that ends, “et homo factus est” (“and He was made man”). After the Credo, the priest turns to face the people and says “Dominus vobiscum” (the Lord be with you), and the servers (and the people, if they want) respond with, “Et cum spiritu tuo” (and with your spirit). Everyone sits, and the ushers come around to collect the offering while the priest (quietly) reads the Offertory prayer that’s in the proper.
From this point until Communion, many of the prayers of the priest are silent, which may be one of the strangest things for someone who’s used to the constant activity and dialogue in the modern format. Once I got used to it, though, I found that the silence allowed me to get into a more reverent state.
After the priest mixes the water and wine and washes his hands (the Lavabo), he turns to the people and says the Orate Fratres (Pray, brethren…), and the servers say the reply. Then the priest silently reads the Secret, which is in the proper if you’d like to read it to yourself at the same time. There are a few short prayers and responses by the servers, then the Preface from the proper. There are several different prefaces for different seasons and types of feast day.
At the end of the Preface, the priest goes straight into the Sanctus with “Sanctus, Sanctus, Sanctus” (Holy, holy, holy…), and the server rings the bells three times as everyone kneels. After the Sanctus begins the Canon, much of which he says quietly. It’s all in the missal, so you can follow along by watching his movements at the altar, or just pray and prepare yourself for Communion. The server rings the bells once at “Hanc igitur,” the beginning of the Consecration. Then the servers go up and kneel behind the priest.
After the actual words of Consecration of the Host, the server rings the bells three times: when the priest genuflects, when he elevates the Host, then when he kneels again. This pattern is repeated after the words of Consecration of the Wine. During each elevation, the servers lift the priest’s vestments, which I’ve always thought is nicely symbolic of us (since the servers represent us) assisting him in offering the Sacrifice. Again, this is all done silently except for the bells. Then the servers move back down the steps to where they were before and the Canon continues quietly.
If you’re listening closely, there are three words a bit later in the Canon that the priest says in a louder voice: “Nobis quoque peccatoribus” (To us sinners, also). He finishes the Canon with “Per omnia saecula saeculorum” (World without end) and then goes into the Pater Noster (Our Father). There are some more silent prayers while he breaks the Host and puts a Particle into the Wine, before saying out-loud the Agnus Dei (Lamb of God).
Then there are quiet prayers before Communion for Peace, Sanctification, and Grace, followed by the priest’s Communion. Holding the Host, he strikes his breast three times, each time saying out loud, “Domine, non sum dignus” (Lord, I am not worthy) while the server rings the bells, then finishing the prayer quietly.
After the priest receives the Body and Blood, the servers repeat the Confiteor (I confess) that they and the priest each said back at the first part of Mass. The priest turns to the people (for whom the servers are speaking) and says the prayer of absolution. Most people make the Sign of the Cross when he does at this point.
The servers move up the steps again, and the priest turns to the people and again repeats three times the prayer beginning with “Domine, non sum dignus.” Some people like to recite it with him this time. He then gives Communion to the servers and then to everyone else.
Communion is taken on the tongue, kneeling at the Communion rail, for those who are able to do that. People who have trouble kneeling should sit in the front pew, and Father will bring Communion down to them. He usually does that first, so it’s a good idea for the rest of us to stay back until he’s finished with them, to not get in the way. At the Communion rail, ormally 5-6 people go up and kneel down at one time, he distributes Communion to them all, and then they all leave and make room for the next 5-6.
When you kneel down, place your hands beneath the cloth that hangs over the rail. The idea is that if a Host would drop and miss the paten the server is holding under your chin, it would land on the cloth and not on the floor. Stick your tongue out just a bit so he can place the Host on it. Don’t say “Amen” like we do in the new form; the priest says it for you.
After Communion, eveyone goes back to their pews and kneels again (if they can) while the priest cleans the vessels and puts any extra consecrated hosts away in the tabernacle. The servers move the Book back to the right side of the altar, and the priest reads the Communion prayer, then the Postcommunion prayer, both of which are in the proper. (You’re done with the proper after this.)
The priest then turns to the people and says the dismissal, “Ite, missa est” (Go, the Mass is ended). After one more silent prayer toward the altar, he pronounces the Blessing, and everyone makes the Sign of the Cross as he does.
Now everyone stands as he goes to the far left of the altar for the Last Gospel. This is the beginning of the Gospel of John, and is read at the end of most Masses. Everyone genuflects during the words, “Et Verbum caro factum est,” (And the Word was made flesh).
After Low Mass, everyone kneels again for the prayers ordered by Pope Pius XI in 1929 for the salvation of Russia, which are said in English. After these, everyone stands while the priest and servers genuflect one last time and leave the sanctuary. Mass is over. Some people stay and pray for a while or light a candle, so it’s good to leave quietly and go visit in the hall, where there will be coffee and juice and donuts (at least).
Whew, that got a lot longer than I expected! I don’t suppose anyone could memorize all that before going, but maybe reading this first will help someone recognize what’s happening and not get lost. The important thing is to make sure you get the proper when you come in, and understand that everything that’s not in the proper is in the missal, and the missal will guide you through the Mass. And when Father isn’t speaking up there during the Canon, it doesn’t mean he’s stuck; he’s actually moving right along. If you need help with anything before Mass, feel free to ask an usher. If you aren’t sure who the ushers are, ask one of the guys sitting in the back pew. (Tell them I said that’s what they get for sitting way back there.)
Hope to see you at St. Rose soon!


